Using custom claims & testing RLS with Supabase

Support Engineer @Supabase | StackOverflow
This article will guide you through the process of using custom claims and testing row-level security (RLS) with Supabase and PostgreSQL. By incorporating custom claims, you can enhance the efficiency of your access control rules and improve your application's performance. We will provide examples, instructions, and best practices to help you implement and test RLS policies effectively.
Custom Claims: Enhancing Row-Level Security
Custom claims involve adding JSON data to the access token of an authenticated user in a Supabase project. These claims can be utilized by both the application and the PostgreSQL database server. In Supabase, custom claims are stored in the raw_app_meta_data field of the users table in the auth schema (auth.users.raw_app_meta_data).
The primary advantage of implementing custom claims is their ability to improve the efficiency of row-level security (RLS) policies. RLS policies allow for fine-grained access control at the row level within the database. Traditionally, JOIN operations are used to determine the access control rules for a particular row. However, these JOINs can be computationally expensive, especially when dealing with large datasets.
By leveraging custom claims, you can store the access control rules for a specific row directly in the token itself, eliminating the need for JOIN operations. This approach reduces the computational load on the database server, resulting in faster query times and improved application performance.
Example Case: Implementing RLS with Custom Claims
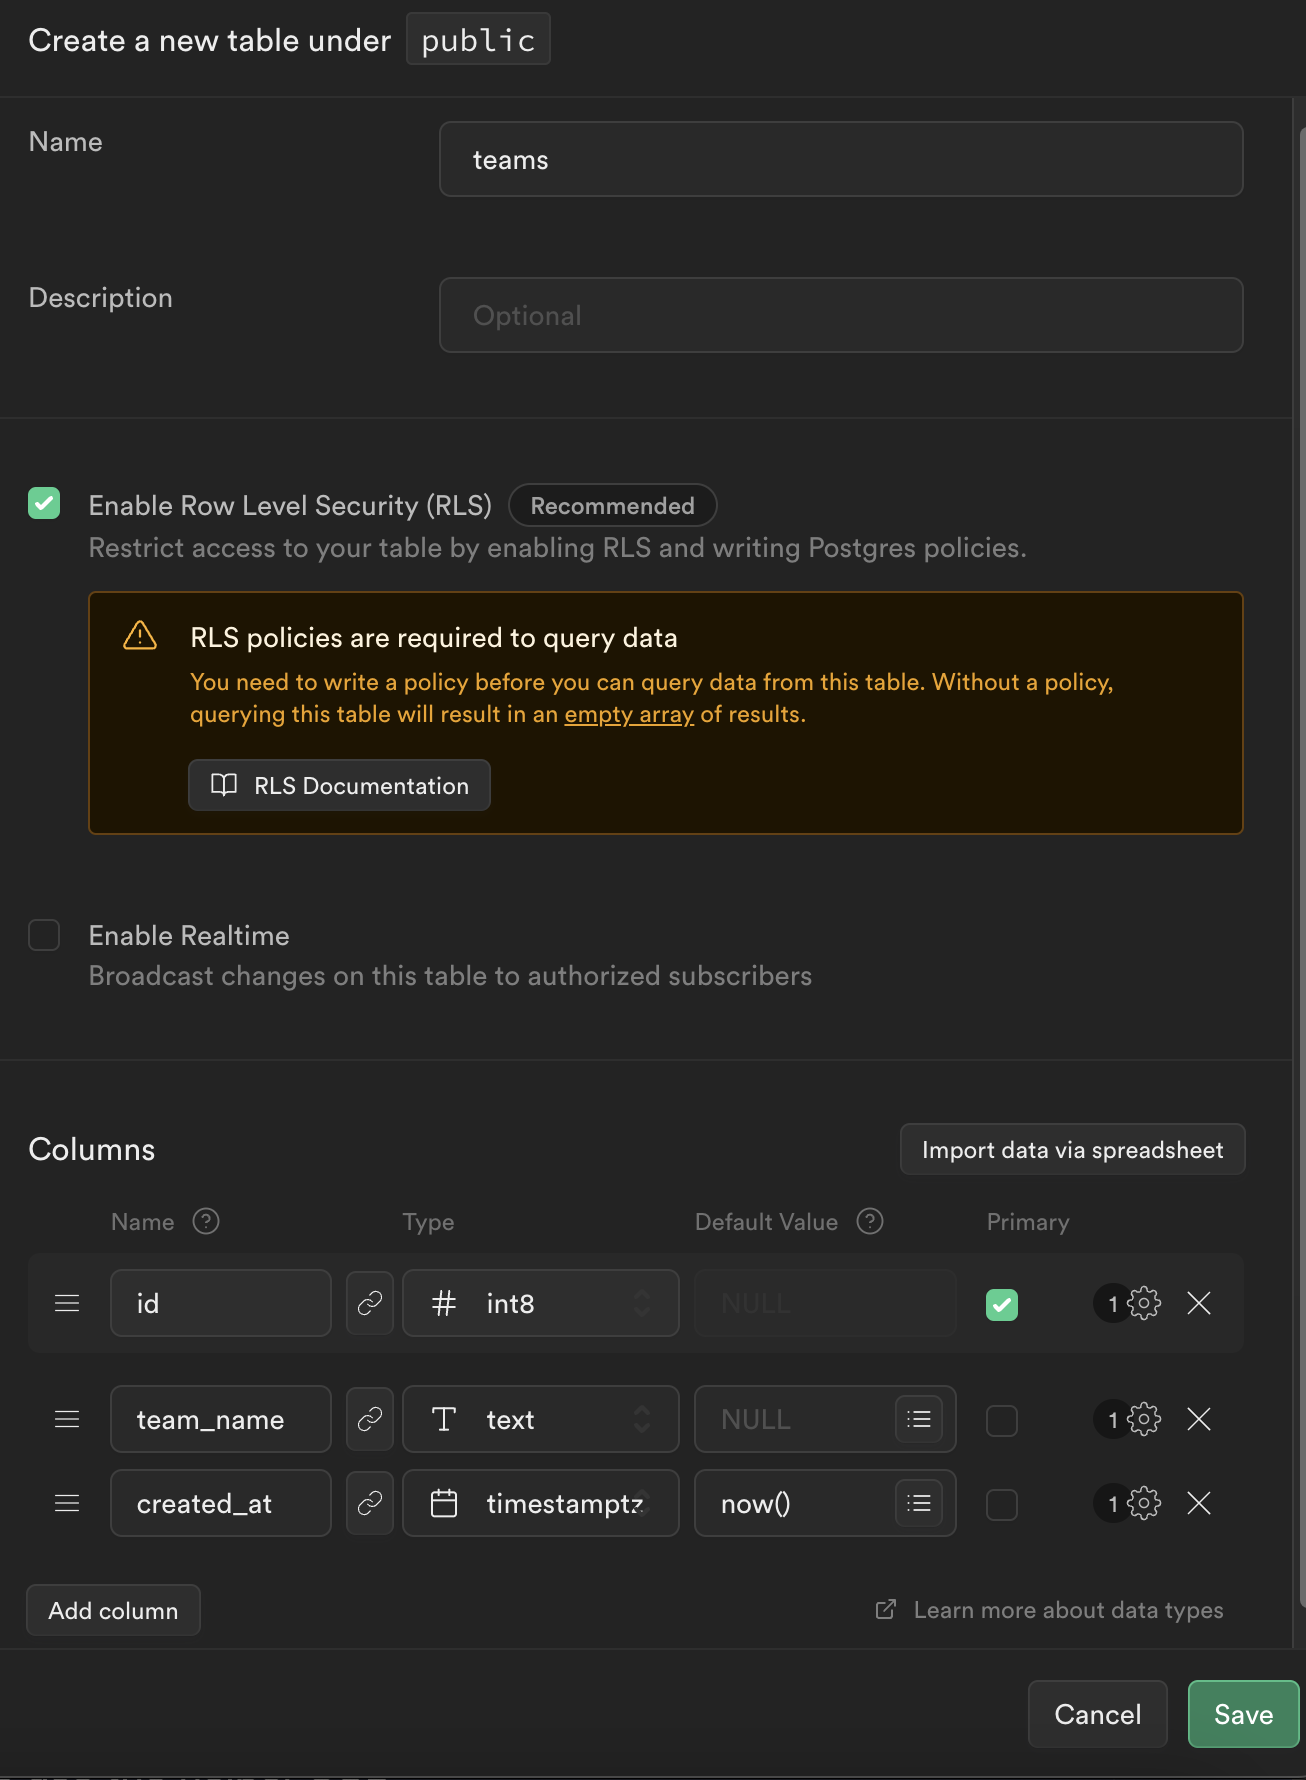
Let's consider an example scenario where we have a teams table in addition to the Supabase users table. We also have a team_members table that associates users with teams. Here's an overview of the steps involved:
Create the necessary tables in Supabase:
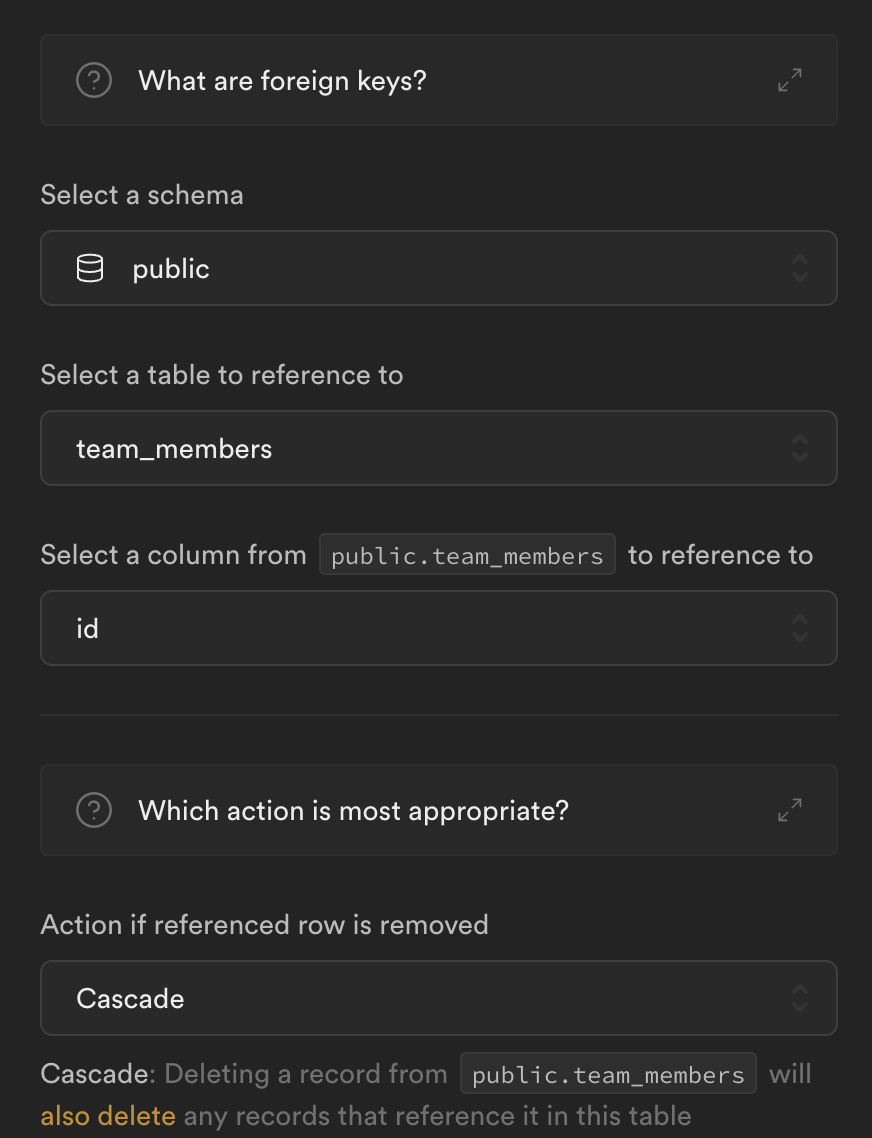
teamsandteam_members.Define the relationships and constraints between the tables.
Populate the tables with relevant data.
Set up an RLS policy for the
team_memberstable to control access based on the user's team membership.
To ensure a seamless implementation, follow the steps below:
Let's create the tables in Supabase:
Now let's create a team_members table:
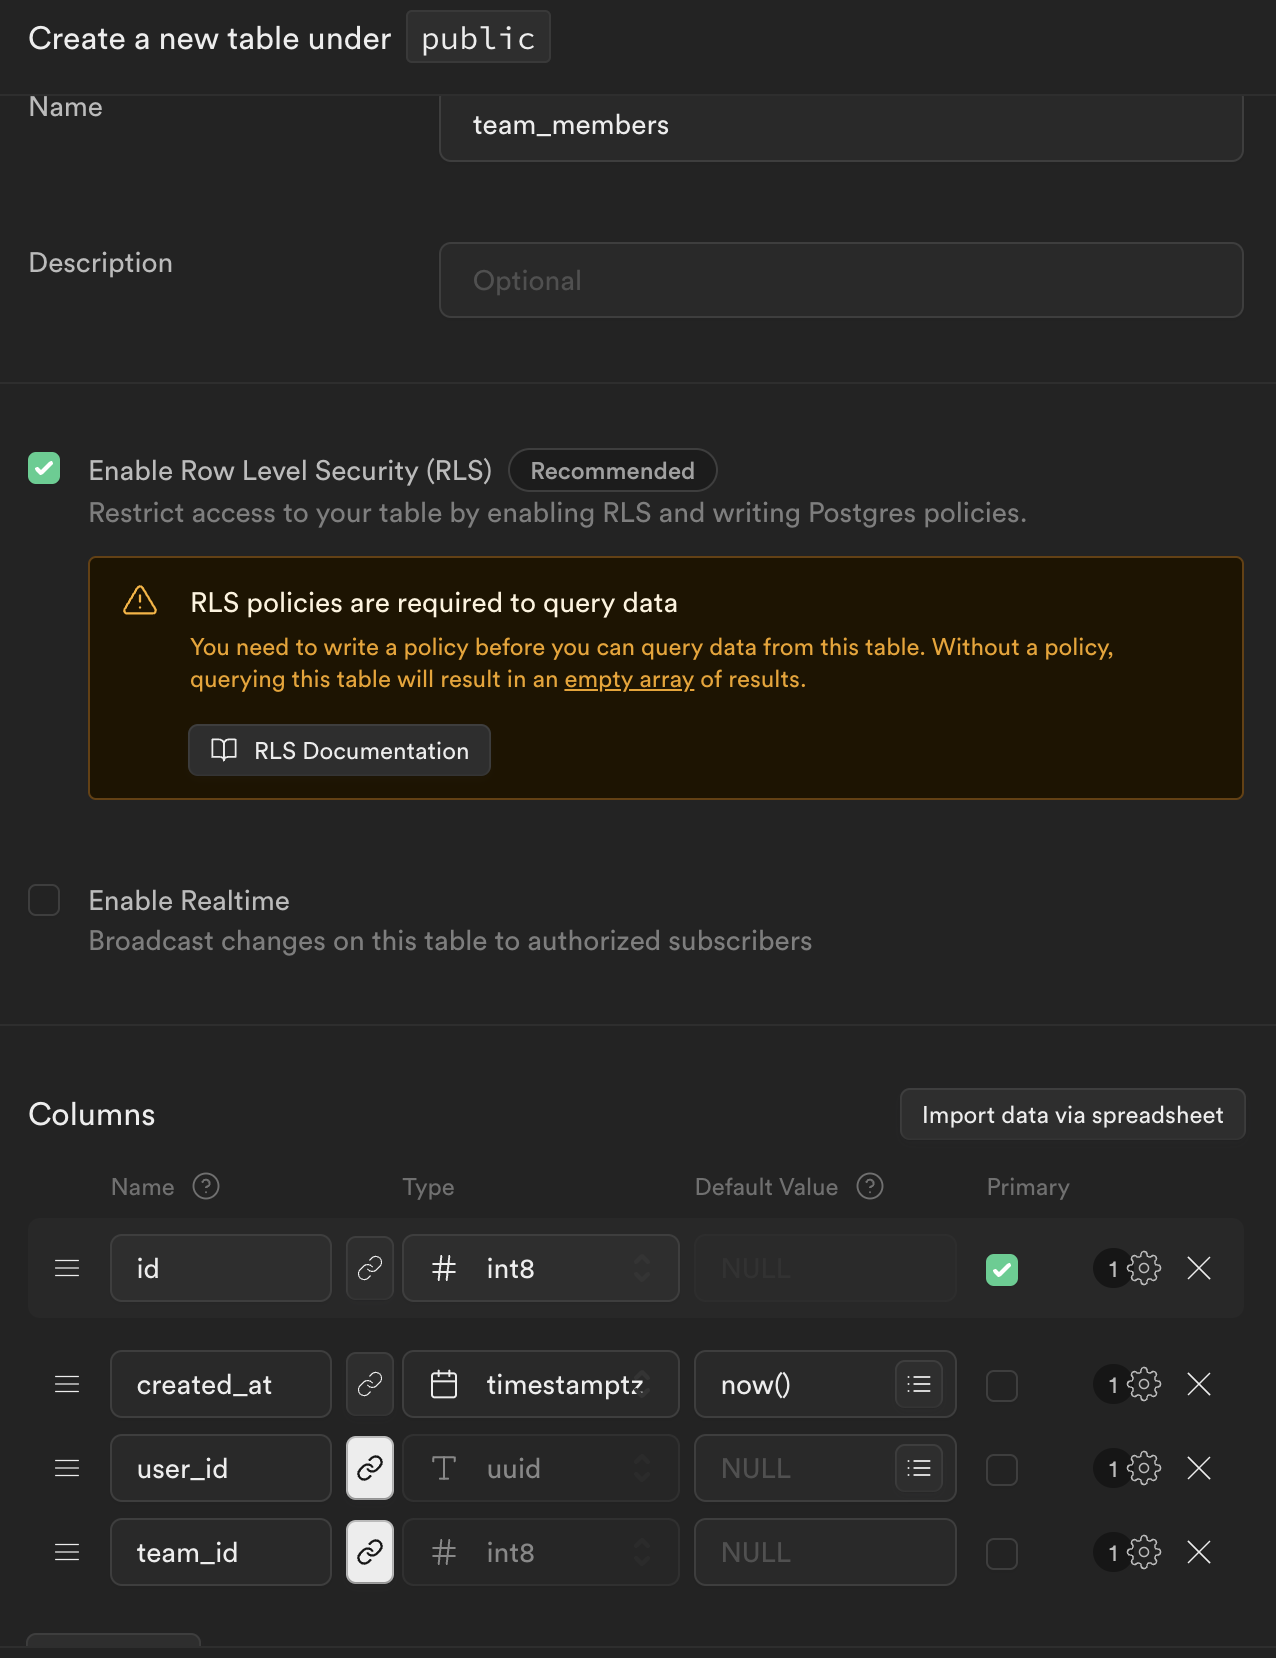
⚠️ Don't forget to set ON DELETE cascade for foreign keys ⚠️
Populating the tables with data:
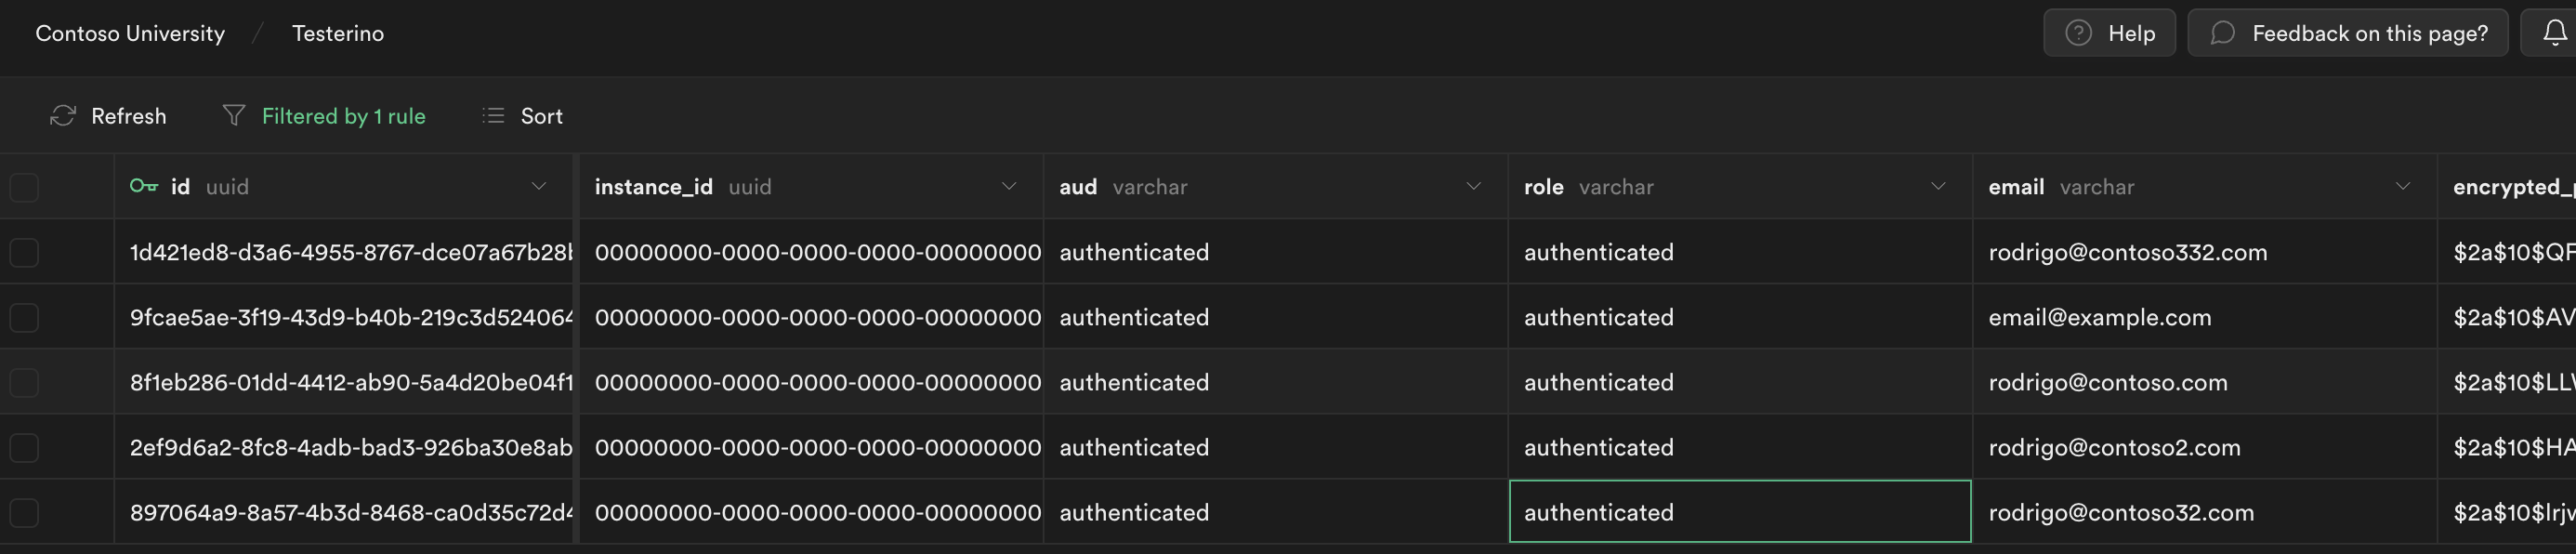
User's table:
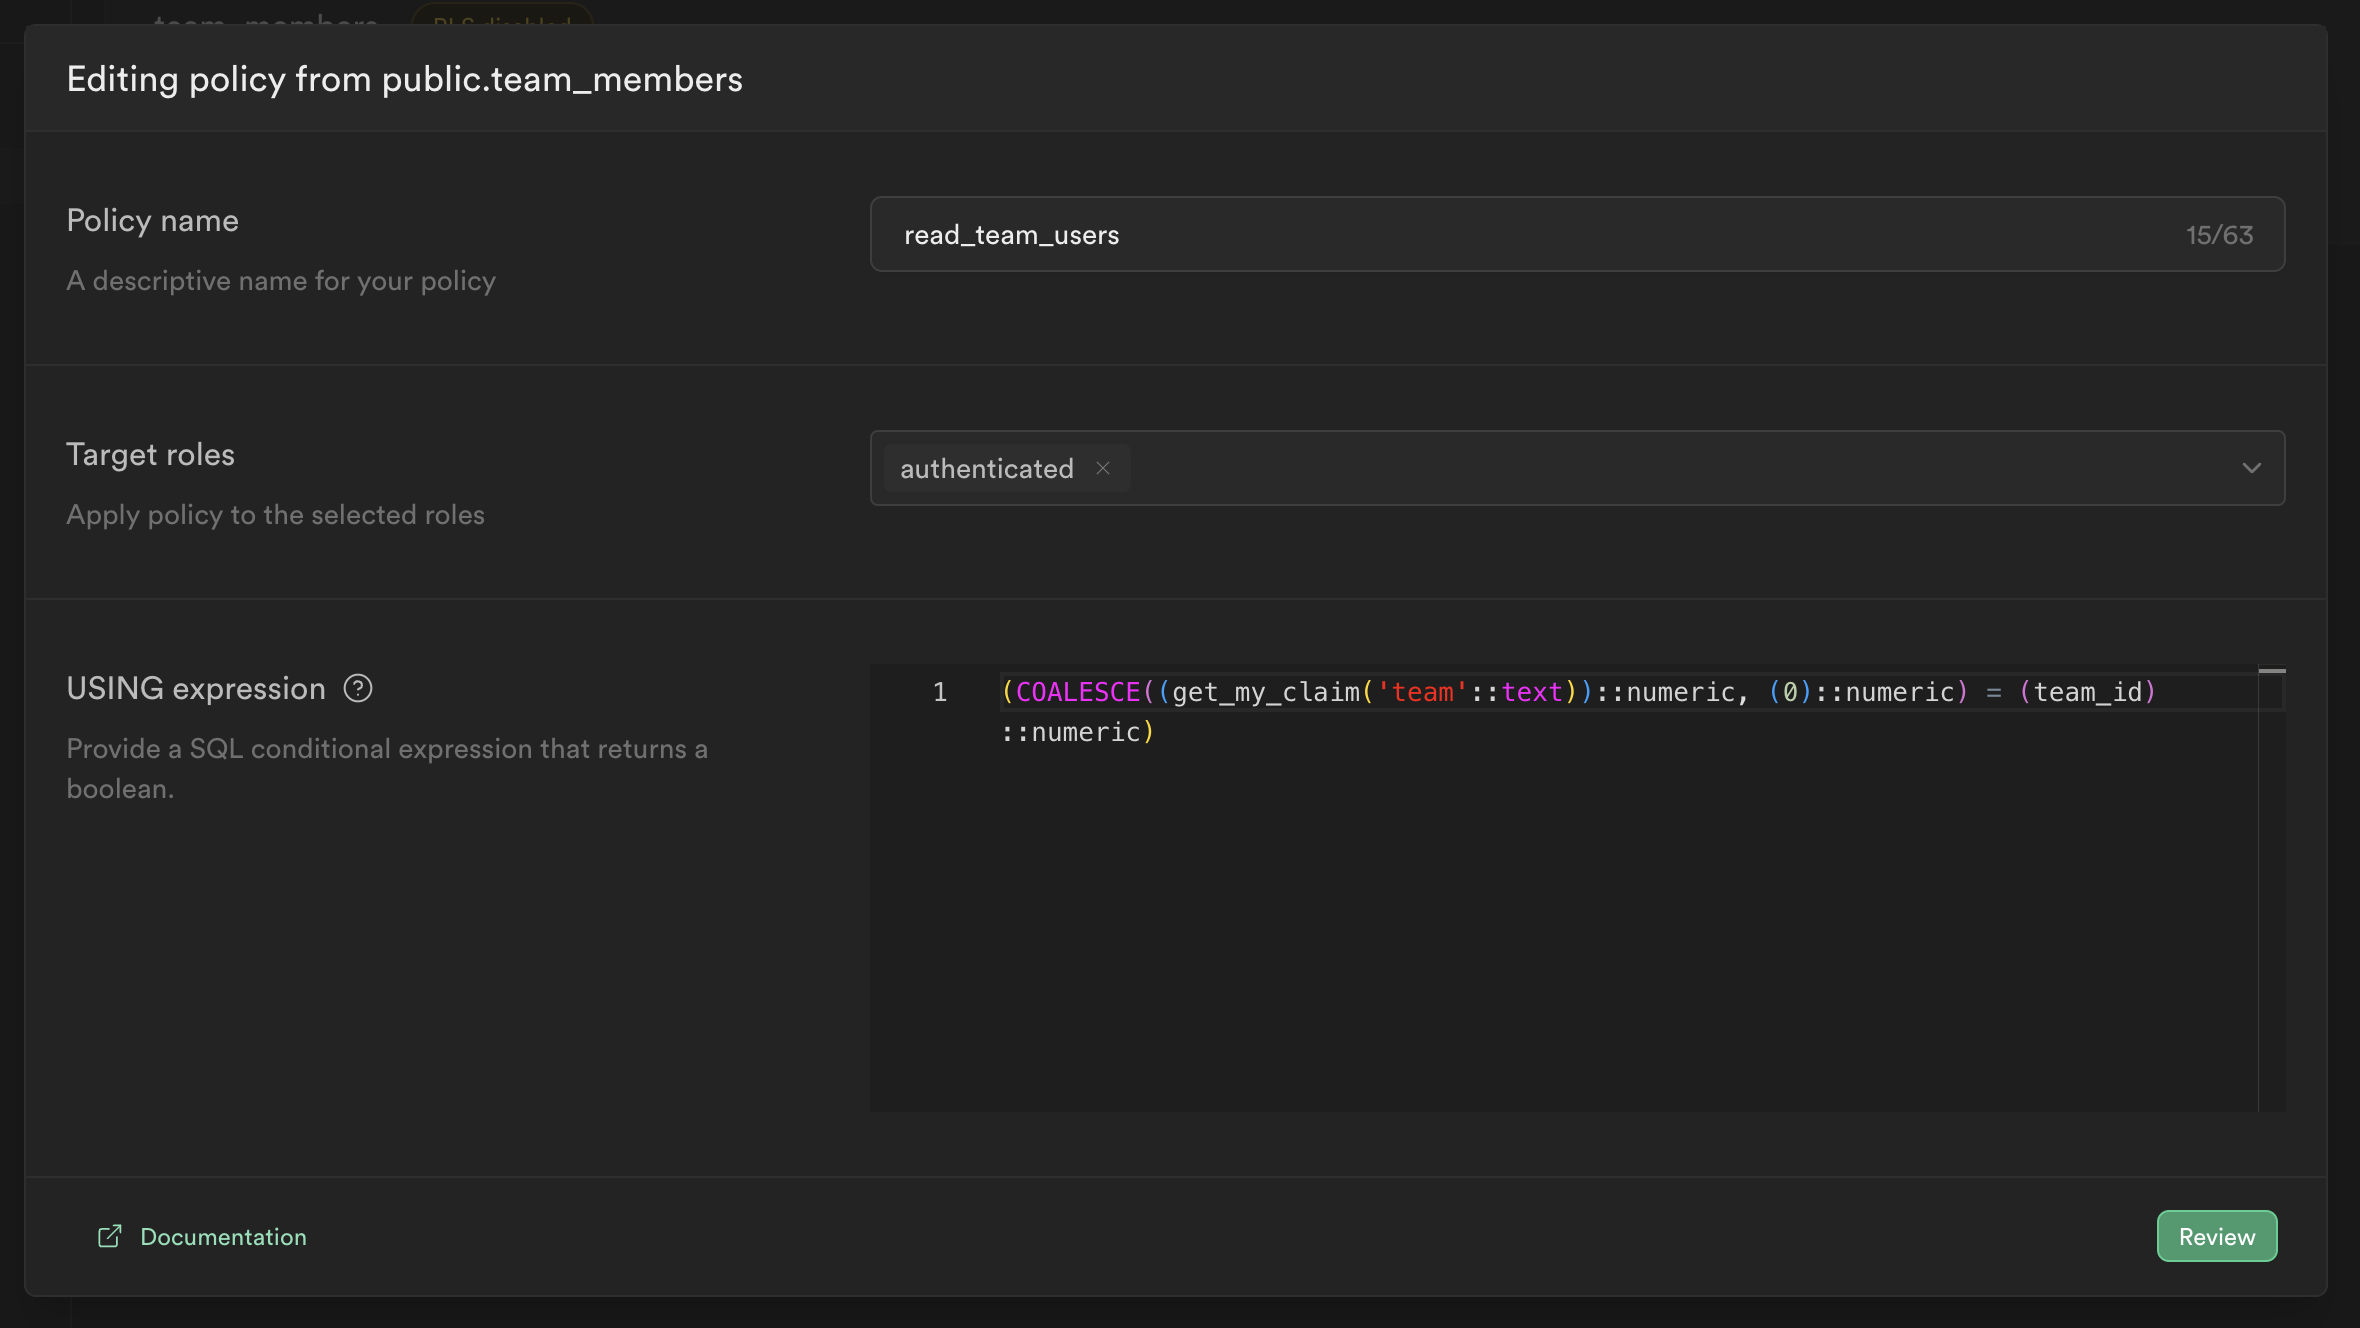
Setting up an RLS policy for the table:
Claim set up for a user
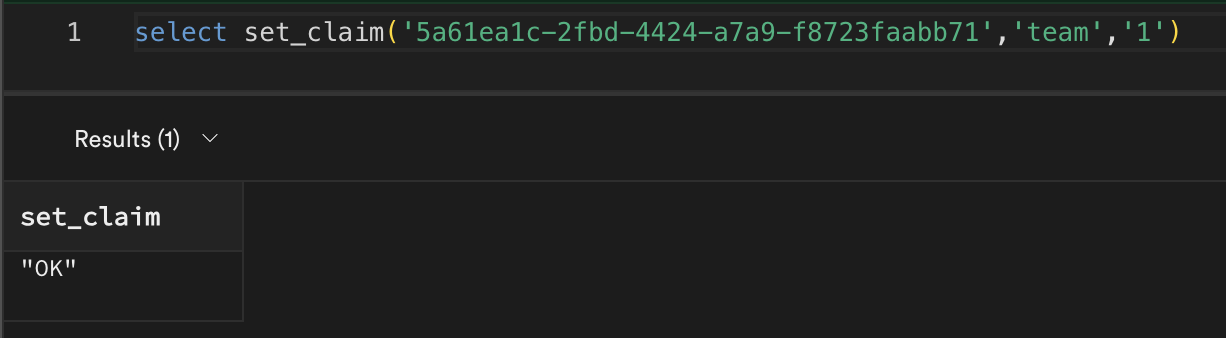
Now, we can set up a claim for a user in our system. You can create a user using the Auth Admin API. Now, we can run this to set the claim for the user in the SQL Editor:
We can check the auth.users table to see this claim we included:
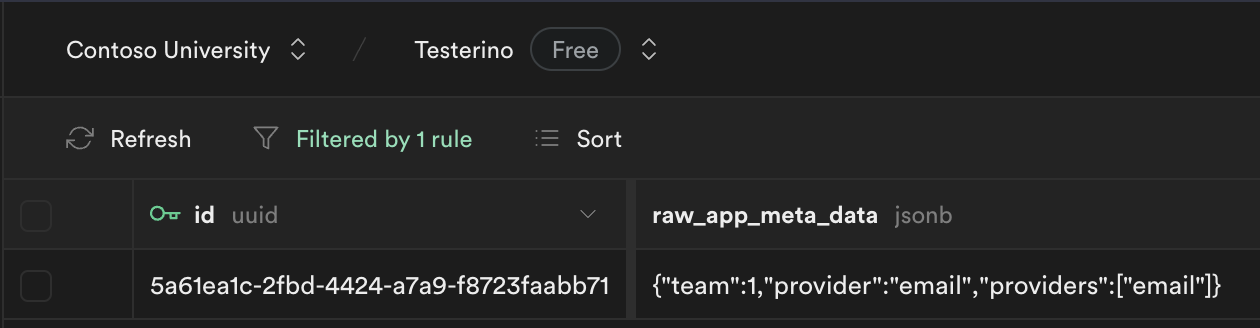
Note that there is already some extra metadata that was automatically entered by Supabase Auth when creating the user.
Testing RLS policies
To ensure that your RLS policies are functioning correctly, it's crucial to test them. Supabase provides a way to test these policies using helper SQL procedures. These procedures allow you to switch between different roles and simulate user access to the database.
Helper SQL procedures (setting it up)
To set up the helper SQL procedures for testing, follow these steps:
grant anon, authenticated to postgres;

create or replace procedure auth.login_as_user(user_email text)
    language plpgsql
    as $$
declare
    auth_user auth.users;
begin
    select
        * into auth_user
    from
        auth.users
    where
        email = user_email;
    execute format('set request.jwt.claim.sub=%L', (auth_user).id::text);
    execute format('set request.jwt.claim.role=%I', (auth_user).role);
    execute format('set request.jwt.claim.email=%L', (auth_user).email);
    execute format('set request.jwt.claims=%L', json_strip_nulls(json_build_object('app_metadata', (auth_user).raw_app_meta_data))::text);
    raise notice '%', format( 'set role %I; -- logging in as %L (%L)', (auth_user).role, (auth_user).id, (auth_user).email);
    execute format('set role %I', (auth_user).role);
end;
$$;

create or replace procedure auth.login_as_anon()
    language plpgsql
    as $$
begin
    set request.jwt.claim.sub='';
    set request.jwt.claim.role='';
    set request.jwt.claim.email='';
    set request.jwt.claims='';
    set role anon;
end;
$$;

create or replace procedure auth.logout()
    language plpgsql
    as $$
begin
    set request.jwt.claim.sub='';
    set request.jwt.claim.role='';
    set request.jwt.claim.email='';
    set request.jwt.claims='';
    set role postgres;
end;
$$;
⚠️You need to use PSQL to run the tests⚠️
You can install PSQL in macOS and Windows by following these links and instructions there.
For Linux (debian):
sudo apt-get updatesudo apt-get install postgresql-client
Using the helpers to simulate login and RLS policies:
Connect with the database with PSQL:
psql -U postgres -h db.<ref>.supabase.co -d postgres -p 6543
Now, we can start testing the policies.
Default/Postgres user access:
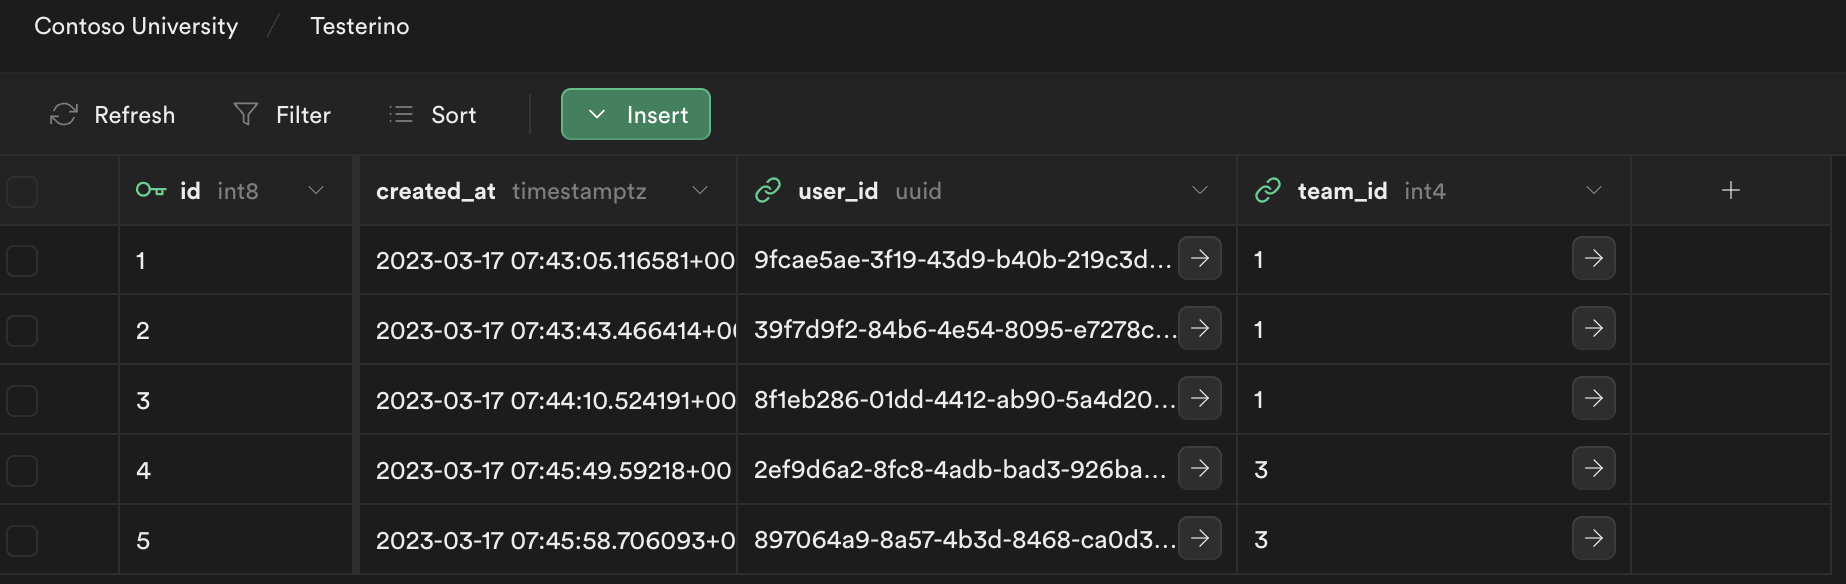
postgres=> select * from team_members;
 id |          created_at           |               user_id                | team_id
----+-------------------------------+--------------------------------------+---------
  1 | 2023-03-17 07:43:05.116581+00 | 9fcae5ae-3f19-43d9-b40b-219c3d524064 |       1
  2 | 2023-03-17 07:43:43.466414+00 | 39f7d9f2-84b6-4e54-8095-e7278cfee573 |       1
  3 | 2023-03-17 07:44:10.524191+00 | 8f1eb286-01dd-4412-ab90-5a4d20be04f1 |       1
  4 | 2023-03-17 07:45:49.59218+00  | 2ef9d6a2-8fc8-4adb-bad3-926ba30e8abc |       3
  5 | 2023-03-17 07:45:58.706093+00 | 897064a9-8a57-4b3d-8468-ca0d35c72d44 |       3
(5 rows)
postgres=>
Anon login:
-- Login:
postgres=> call auth.login_as_anon();
CALL
-- Getting the records allowed:
postgres=> select * from team_members;
 id | created_at | user_id | team_id
----+------------+---------+---------
(0 rows)
-- Logout:
postgres=> call auth.logout();
Simulate user access
-- Login:
postgres=> call auth.login_as_user('rodrigo@contoso.com');
NOTICE:  set role authenticated; -- logging in as '8f1eb286-01dd-4412-ab90-5a4d20be04f1' ('rodrigo@contoso.com')
CALL
-- Getting the records allowed for this user:
postgres=> select * from team_members;
 id |          created_at           |               user_id                | team_id
----+-------------------------------+--------------------------------------+---------
  1 | 2023-03-17 07:43:05.116581+00 | 9fcae5ae-3f19-43d9-b40b-219c3d524064 |       1
  2 | 2023-03-17 07:43:43.466414+00 | 39f7d9f2-84b6-4e54-8095-e7278cfee573 |       1
  3 | 2023-03-17 07:44:10.524191+00 | 8f1eb286-01dd-4412-ab90-5a4d20be04f1 |       1
(3 rows)
-- Logout:
postgres=> call auth.logout();
From here, you can simulate different user accesses and test the RLS policies using the helper SQL procedures.
Conclusion
By implementing custom claims and testing row-level security (RLS) with Supabase and PostgreSQL, you can enhance the efficiency of your access control rules and improve application performance. This article provided an overview of custom claims, example scenarios, and instructions on testing RLS policies using Supabase's helper SQL procedures. Remember to balance SEO optimization techniques with valuable content that satisfies your readers' intent.
You can also continue reading with another post where you can set triggers to map the automatically the relationship between tables using custom claims.